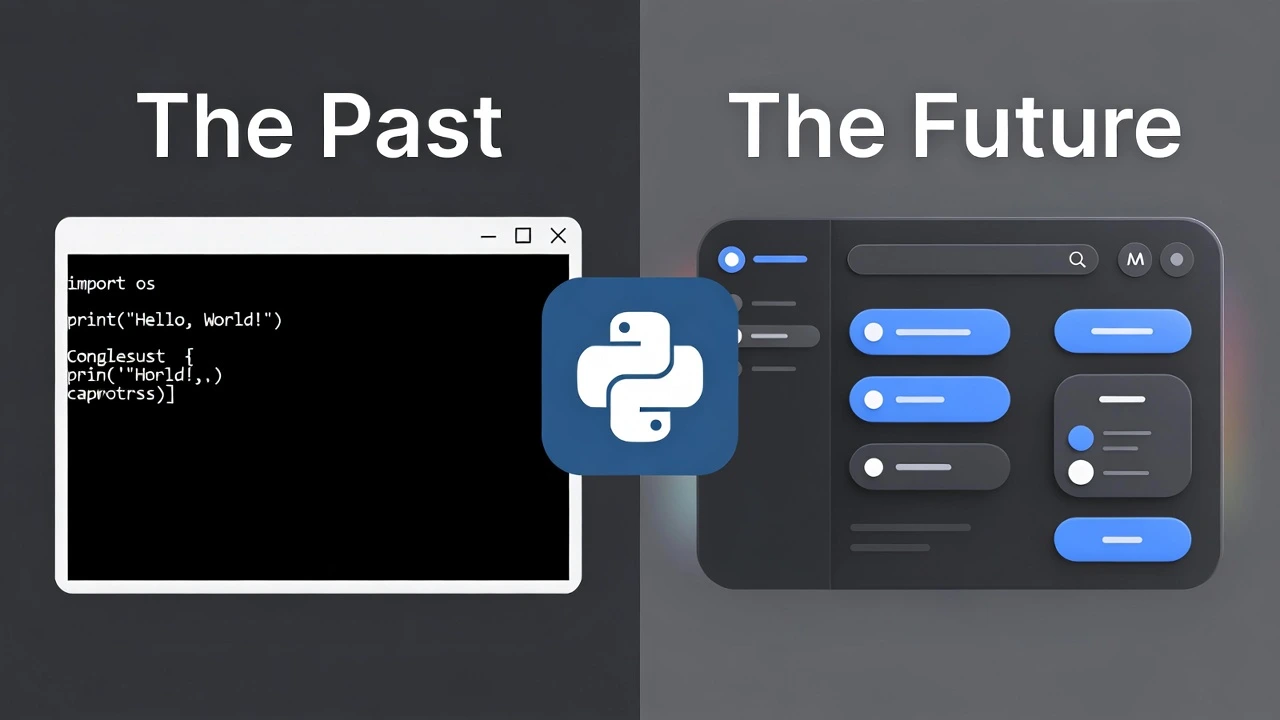
⚡ From Script to Software
- The Problem: Regular Python scripts run in a black terminal window. They look scary to non-coders.
- The Solution: A GUI (Graphical User Interface) gives your code buttons, windows, and sliders.
- The Tool: We are using CustomTkinter. It creates modern, rounded, “Dark Mode” apps automatically.
You have built crypto trackers, file cleaners, and automation bots. But they all have one problem: they look like “hacker code” running in a terminal.
If you want to share your tools with friends (or sell them), you need an interface. You need buttons to click and boxes to type in.
Today, we are going to build your first real Desktop Application: a Modern To-Do List Manager.
The Toolkit 🧰
Python has a built-in GUI library called tkinter, but it looks like it’s from Windows 95. Ugly gray squares. Yuck.
Instead, we will use CustomTkinter. It’s a wrapper that makes everything look modern, rounded, and clean.
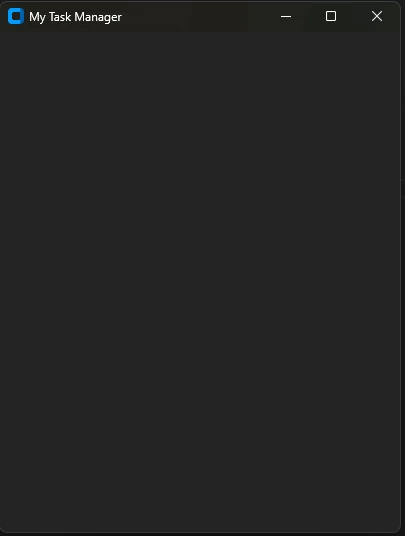
pip install customtkinterStep 1: The “Hello World” Window 🪟
Let’s create a blank window. Unlike a script that runs top-to-bottom and quits, an App runs in a “Loop,” waiting for you to click something.
import customtkinter as ctk

# 1. System Settings
ctk.set_appearance_mode("System")  # Defaults to your OS theme (Dark/Light)
ctk.set_default_color_theme("blue")  # Themes: "blue" (standard), "green", "dark-blue"

# 2. Create the App
app = ctk.CTk()
app.geometry("400x500")
app.title("My Task Manager")

# 3. Run the Loop
app.mainloop()
Run this code. A sleek, empty window should pop up on your screen. Congratulations! You just built your first app.
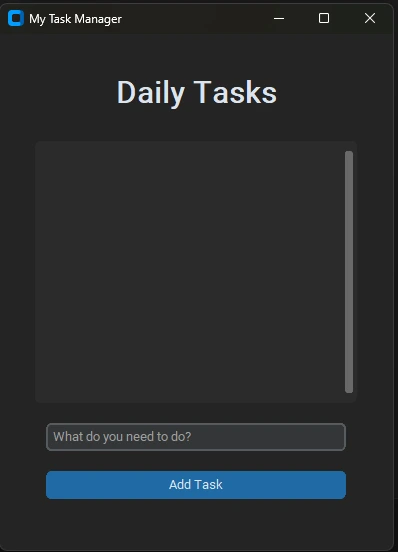
Step 2: Designing the Layout 🎨
We need three things:
- A Title at the top.
- A Scrollable Area to hold our tasks.
- An Entry Box and Button at the bottom to add new tasks.
We use pack() to stack items on top of each other. It’s the easiest layout method for beginners.
# ... (Previous setup code) ...

# Title
title_label = ctk.CTkLabel(app, text="Daily Tasks", font=ctk.CTkFont(size=30, weight="bold"))
title_label.pack(padx=10, pady=(40, 20))

# Scrollable Area (Where tasks will go)
scroll_frame = ctk.CTkScrollableFrame(app, width=300, height=250)
scroll_frame.pack(padx=10, pady=10)

# Entry Box (Type here)
entry = ctk.CTkEntry(app, placeholder_text="What do you need to do?", width=300)
entry.pack(padx=10, pady=10)

# Button (Click me)
add_button = ctk.CTkButton(app, text="Add Task", width=300)
add_button.pack(padx=10, pady=10)

app.mainloop()
Step 3: Making It Work (The Logic) 🧠
Right now, the button clicks but does nothing. We need a function to handle the click.
When you click “Add Task,” we want to:
1. Get the text from the Entry box.
2. Create a generic “Checkbox” inside the Scrollable Frame.
3. Clear the Entry box.
The Final Complete Code
Create a file named task_app.py and copy this entire block:
import customtkinter as ctk

def add_task():
    task_text = entry.get()

    if task_text: # Only add if text is not empty
        # Create a checkbox with the task text
        checkbox = ctk.CTkCheckBox(scroll_frame, text=task_text)
        checkbox.pack(anchor="w", padx=10, pady=5) # 'w' means West (Left align)

        # Clear the input box
        entry.delete(0, "end")

# --- Setup ---
ctk.set_appearance_mode("System")
ctk.set_default_color_theme("blue")

app = ctk.CTk()
app.geometry("400x550")
app.title("LogicPy Tasks")

# --- UI Elements ---
title_label = ctk.CTkLabel(app, text="Daily Tasks 📝", font=ctk.CTkFont(size=30, weight="bold"))
title_label.pack(padx=10, pady=(40, 20))

scroll_frame = ctk.CTkScrollableFrame(app, width=300, height=300)
scroll_frame.pack(padx=10, pady=10)

entry = ctk.CTkEntry(app, placeholder_text="Add a new task...", width=300)
entry.pack(padx=10, pady=10)

# Connect the button to the function using 'command='
add_button = ctk.CTkButton(app, text="Add Task", width=300, command=add_task)
add_button.pack(padx=10, pady=10)

# --- Run ---
app.mainloop()
Step 4: Run Your App 🚀
Run the script. Type “Buy Coffee” and hit Enter (or click Add). It appears in the list! You can click the checkbox to mark it as done.
Because we used CTkScrollableFrame, you can add 50 tasks, and a scrollbar will automatically appear. It looks and feels like a real piece of software.

What’s Next?
You have just crossed the bridge from “Scripting” to “App Development.”
Tomorrow, we are going to build something even more functional. We will build a Unit Converter Tool that performs real-time math calculations as you type.
Get ready for: “Build a Real-Time Unit Converter App with Python.”