🚀 Quick Overview
- The Problem: Converting horizontal (16:9) videos into vertical (9:16) videos leaves ugly black bars at the top and bottom.
- The Solution: A Python script that creates a professional “stacked” video—a darkened, zoomed-in background with the main video centered on top.
- The Tech: The
moviepylibrary. - Time to Build: 15 Minutes.
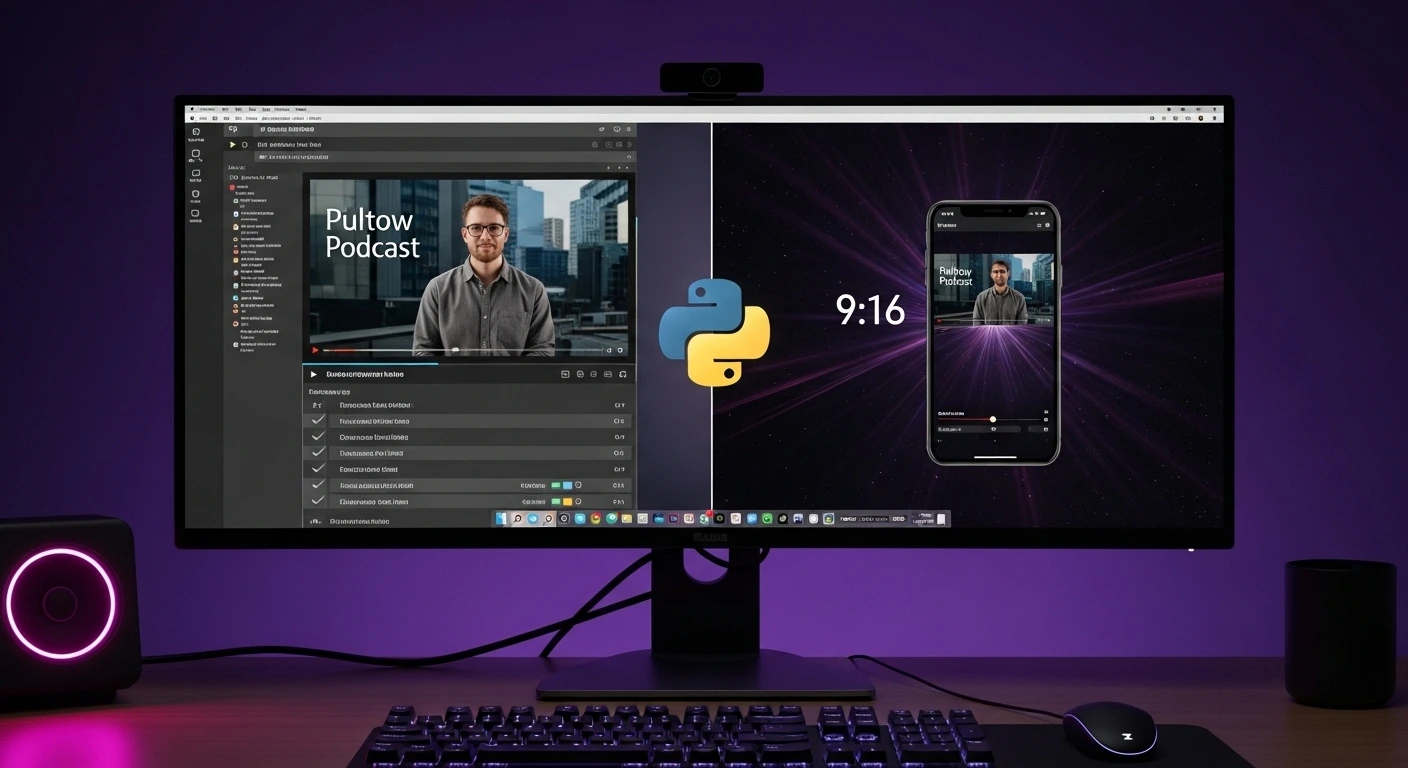
In this tutorial, you will learn how to automate the conversion of landscape videos into vertical TikToks using Python and MoviePy, adding a professional dual-layer background effect.
If you want to grow a brand or sell freelance services to content creators, you need to understand the “Content Pyramid.” A creator films one long YouTube video (or Twitch stream), and the editor chops it up into 10 vertical Shorts to post on TikTok and Instagram Reels.
The problem? Horizontal video doesn’t fit on a vertical phone screen. If you just shrink it down, you are left with massive, amateur-looking black bars at the top and bottom of the screen.
Professional editors fix this by duplicating the video, zooming the bottom layer in to fill the screen, and darkening it to create a cinematic background. Doing this manually for 10 clips takes hours. Today, we are going to write a Python script that does it in 3 seconds.
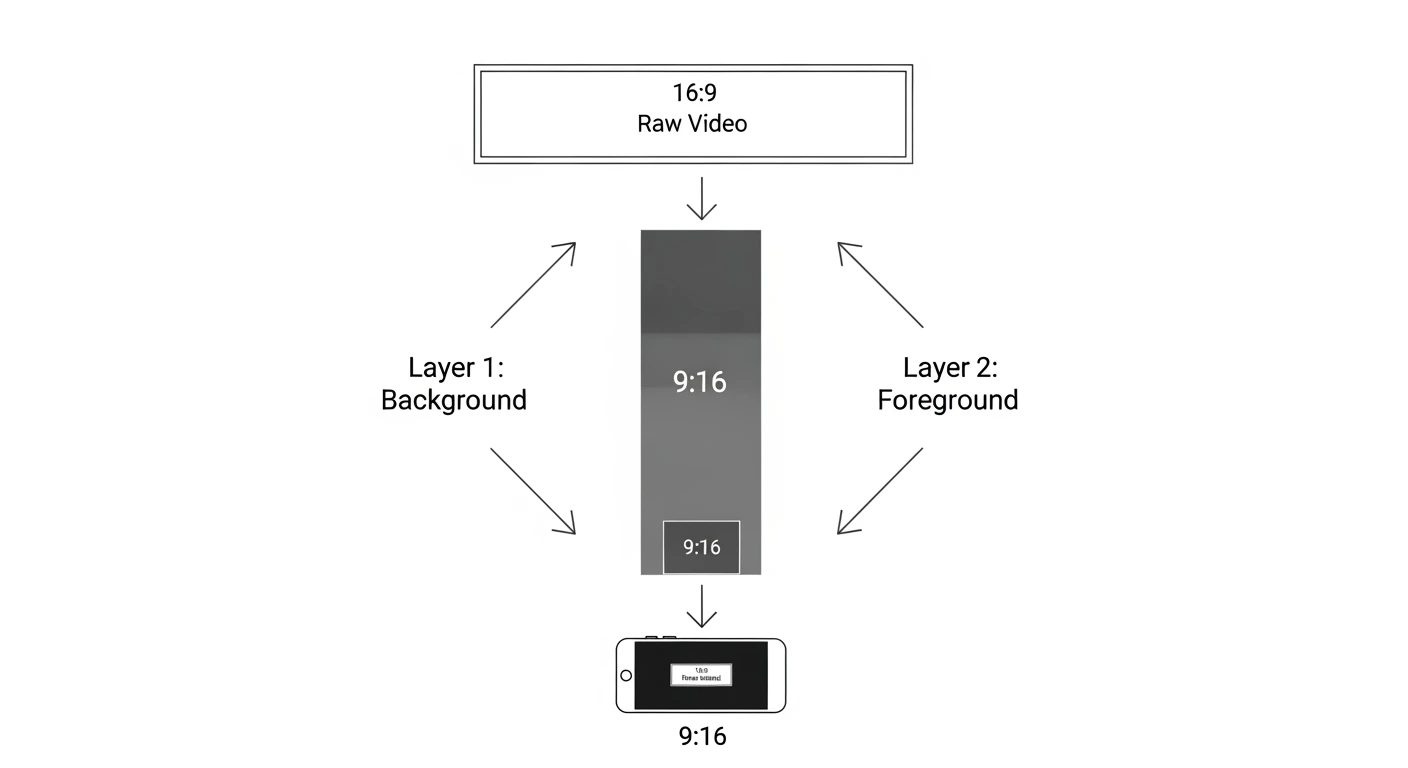
Step 1: The Concept of “Compositing”
In our previous MoviePy tutorial, we stitched an audio track to a single image. Today, we are doing something more advanced: Compositing.
Compositing simply means stacking multiple video layers on top of each other, just like layers in Photoshop. We need two layers:
- Layer 1 (The Background): The original video, stretched to 1920 pixels tall, cropped to fit the screen, and darkened by 70%.
- Layer 2 (The Foreground): The original video, shrunk to 1080 pixels wide, placed dead-center on top of Layer 1.
Step 2: The Python Code
Ensure you have MoviePy installed (pip install moviepy) and place a test landscape video named landscape.mp4 in your folder.
Create a file named tiktok_converter.py and add the following code:
from moviepy.editor import VideoFileClip, CompositeVideoClip
import moviepy.video.fx.all as vfx

print("1. Loading original horizontal video...")
clip = VideoFileClip("landscape.mp4")

# Standard TikTok / Shorts Dimensions
TARGET_W, TARGET_H = 1080, 1920

# --- LAYER 1: THE BACKGROUND ---
print("2. Generating cinematic background...")
# Resize height to 1920 (this will make the width massive, maintaining aspect ratio)
bg_clip = clip.resize(height=TARGET_H)

# Crop the exact center of this massive video to be 1080px wide
bg_clip = vfx.crop(
    bg_clip,
    x_center=bg_clip.w / 2,
    y_center=bg_clip.h / 2,
    width=TARGET_W,
    height=TARGET_H
)

# Darken the background layer so the main video pops out (0.3 = 30% brightness)
bg_clip = bg_clip.fx(vfx.colorx, 0.3)


# --- LAYER 2: THE FOREGROUND ---
print("3. Formatting main video...")
# Resize the original video so its width perfectly fits the screen (1080px)
fg_clip = clip.resize(width=TARGET_W)

# Place it exactly in the vertical center of the screen
fg_clip = fg_clip.set_position("center")


# --- COMBINE AND RENDER ---
print("4. Stacking layers and rendering... (Go grab a coffee ☕)")
# Stack the foreground on top of the background
final_video = CompositeVideoClip([bg_clip, fg_clip])

# Ensure the new video is exactly as long as the original
final_video = final_video.set_duration(clip.duration)

# Write the final file
final_video.write_videofile("tiktok_ready.mp4", fps=24, codec="libx264", audio_codec="aac")

print("✅ Complete! Check out 'tiktok_ready.mp4'.")
Step 3: The Result
When you run this script, Python will unpack every single frame of your video, duplicate it, apply the math, and repackage it.
Open tiktok_ready.mp4. Instead of black bars, you now have a highly professional, dynamic background that moves along with your main video. This is the exact visual format used by top-tier gaming, podcast, and commentary channels.
Real-World Freelance Value
This script is the missing link in a fully automated content pipeline. If you combine this with the Whisper AI bot we built in Week 1, you could:
- Write a script that watches a designated folder on your computer.
- When you drop a horizontal podcast clip into the folder, Python automatically transcribes it with Whisper.
- Python then automatically runs this MoviePy script to convert it to 9:16 vertical format.
You have essentially built a robot that does the job of a junior video editor for free.
Conclusion
Understanding how to composite layers in MoviePy unlocks infinite possibilities for visual automation. Next week, we are going to combine text and video, teaching Python how to burn viral, dynamic subtitles directly onto our clips!